


Sanity.io is the platform for structured content. With Sanity.io you can manage your text, images, and other media with APIs. You can also use the open-source single page application Sanity Studio to quickly set up an editing environment that you can customize. With Sanity.io you have access to a bunch of APIs, libraries, and tooling that helps you leverage the benefits of having all your content available as a single source of truth.
– sanity.io
This article will serve as a guide which outlines how to create a working Sanity project, a headless CMS.
Pre-requisites
- NodeJS
Before Starting
Register for a free-tier account on sanity.io to try it out. The account will be used for the project initialization, although it is also possible to register through the instructions from running sanity init. Sanity gives an option to register with Google, GitHub, or by email and password at https://accounts.sanity.io/signup/.
Installing and Setup
Simply execute the following commands as also shown in Sanity's website and guides. It installs sanity CLI globally through npm and then runs sanity init to start setting up the project.
npm i -g @sanity/cli
sanity init
After following the instructions and initialization is complete, go into the Sanity project's directory and run sanity start to start a local development server of Sanity Studio. The program should output the location of the server for browser access, which is usually at http://localhost:3333.
Schemas
The main focus of Sanity development is about schemas. Schemas defines how the data should be inputted. By default, the initialization of Sanity project generates a file named schema.js which should contain an example schema. A minimal Schema looks like this:
import createSchema from 'part:@sanity/base/schema-creator'
import schemaTypes from 'all:part:@sanity/base/schema-type'

export default createSchema({
  name: 'default',
  types: schemaTypes.concat([
    // Add your own types here
    {
      title: "My Example Document Type",
      name: "exampleDocumentType",
      type: "document",
      fields: [
        {
          title: "Greeting",
          name: "greeting",
          type: "string"
        }
      ]
    }
  ])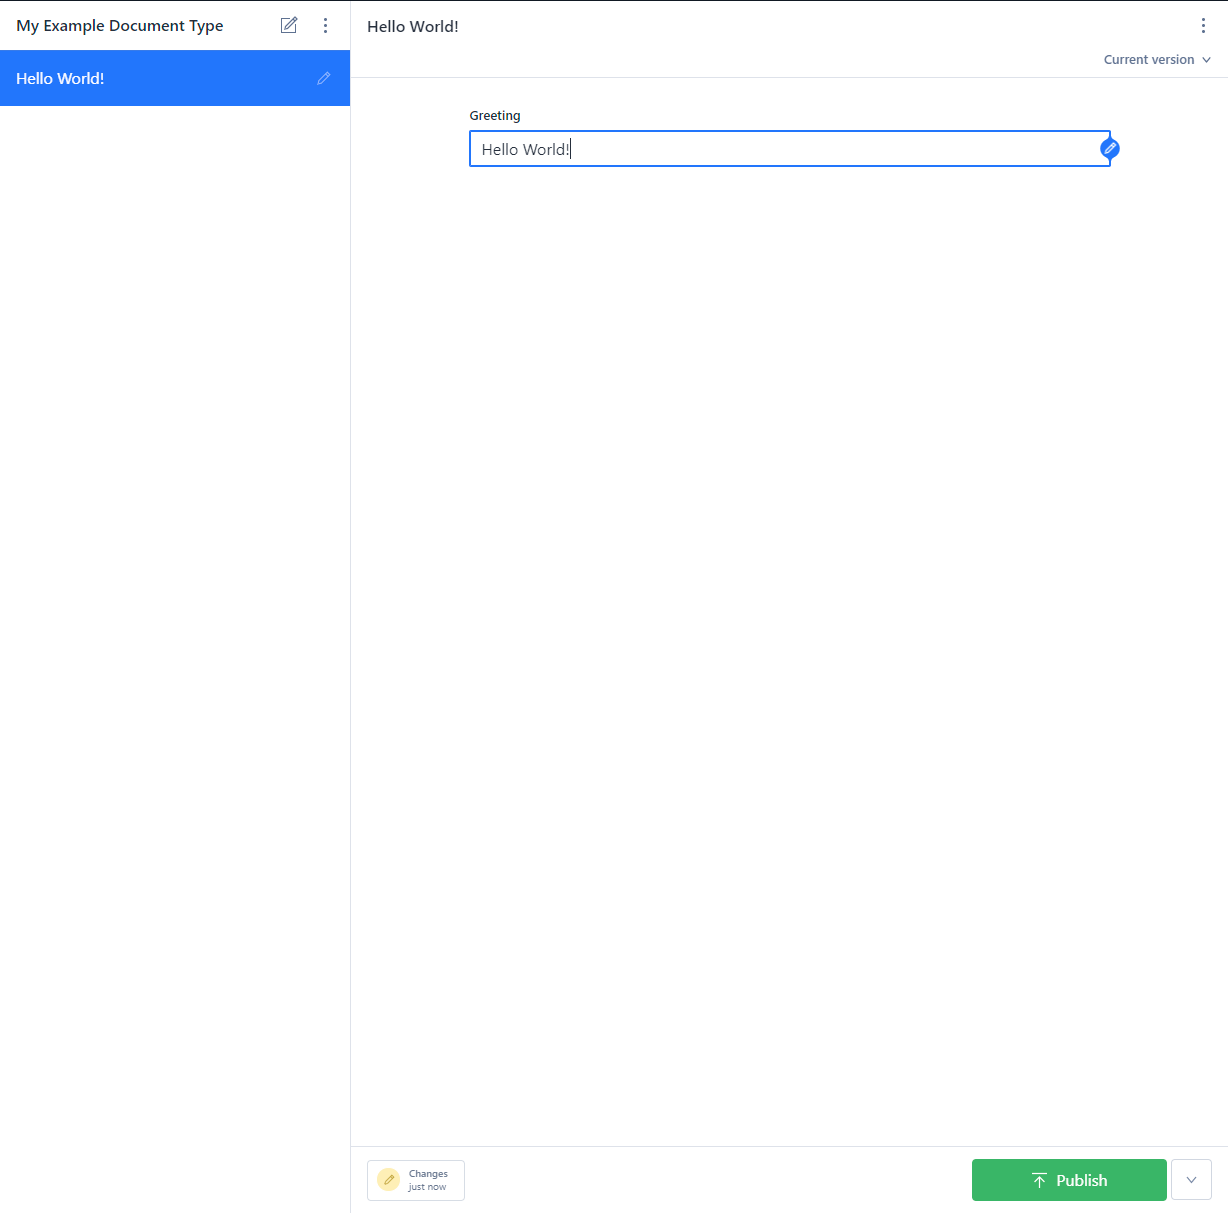
})schema.js ContentThis schema enables us to input a document with one text field named greeting in Sanity Studio.
Though, for actual project implementations, it might require the document to have various fields or even multiple schemas with a different set of fields. More on Schemas here: https://www.sanity.io/docs/schema-types
GraphQL API
Sanity, being a headless CMS, is basically just the back-end of a web app. So in order to make a full-fledged web app there should be a front-end to pull the data from Sanity. One convenient method of that is by using Sanity's GraphQL API feature. To use the GraphQL API, it must be deployed with the following command:
sanity graphql deploySanity will then automatically create GraphQL schemas and then deploy it to Sanity's hosted services. The command also gives an option to enable GraphQL Playground or not, which can be useful for development.
The GraphQL API endpoint has the following structure:
https://<yourProjectId>.api.sanity.io/v1/graphql/<dataset>/<tag>And then there's a CDN version of this API:
https://<yourProjectId>.apicdn.sanity.io/v1/graphql/<dataset>/<tag>Where:
<yourProjectId>= The project ID found in the Sanity project management console.<dataset>= Dataset name to be queried.<tag>= The API tag, can be found fromsanity graphql deployoutput. (usually "default")
The whole URL for the deployed GraphQL API is also outputted by sanity graphql deploy command upon deployment process finishes.
Project ID can be found on the Sanity's management dashboard (https://sanity.io/manage) or in the project's sanity.json.
Deployment
Simply run the following command to upload the developed project:
sanity deployThis requires a hostname to be provided by Sanity Studio if it has not been assigned to the project yet. This is so it can be accessed from the Internet.
After the deployment is done, congratulations! You have created a fully working Sanity.io project!
Caveat
There are a few things that need to watch out for when developing a Sanity CMS project.
Dataset Sharing
If not specified in sanity.json, the dataset that's being used in development mode and production (deployed) mode is shared by default. This means any data being posted from the development server will also be visible in the production environment. To use a separate dataset, create the development-only dataset through the management console or CLI, and then specify it in the project's sanity.json file:
{
  // ... project info etc
  "api": {
    "projectId": "<your_project_id>",
    "dataset": "example"
  },
  "env": {
    "development": {
      "dataset": "example-dev"
    }
  },
  // ...
}
Any specification in env.development will only be used during sanity start runs and not for the deployed ones. After this configuration, development runs will use example-dev dataset while the deployed production-mode Sanity Studio will use example dataset.
Reference: https://www.sanity.io/docs/sanity-json#933842c25dea
GraphQL Deployment
GraphQL changes that resulted from schema changes in development mode does not automatically get deployed. So, after finalizing changes to the schema in development mode, the GraphQL API needs to be redeployed. This is done by simply running the deployment command again:
sanity graphql deploy


